How to connect your EV to the Octopus Energy app (Audi, Cupra, Nissan, Porsche, Seat, Skoda, VW)
Here’s what you need to do to connect your EV to the Octopus Energy app.
First, you need to be an Octopus Energy customer. If you’re not one yet, you can sign up now.
You also need to be on either the Intelligent Octopus Go tariff- you can switch tariff in two clicks here
Or our Intelligent Drive Pack tariff- which you can subscribe to here.
This guide applies to the following EVs:
- Audi
- Cupra
- Nissan (Ariya only)
- Porsche
- Seat
- Skoda
- VW ('ID' range)
Follow this guide if you have a Tesla and this guide if you have a Ford.
Before starting make sure that:
- you have a smart meter that is sending us half hourly readings
- you don’t have any other kind of charging schedule set up - whether that’s on the car, the charger, or a third-party app. Otherwise, you need to disable them first.
Once you switch tariff, you'll have 7 days to connect your EV to the Octopus Energy app.
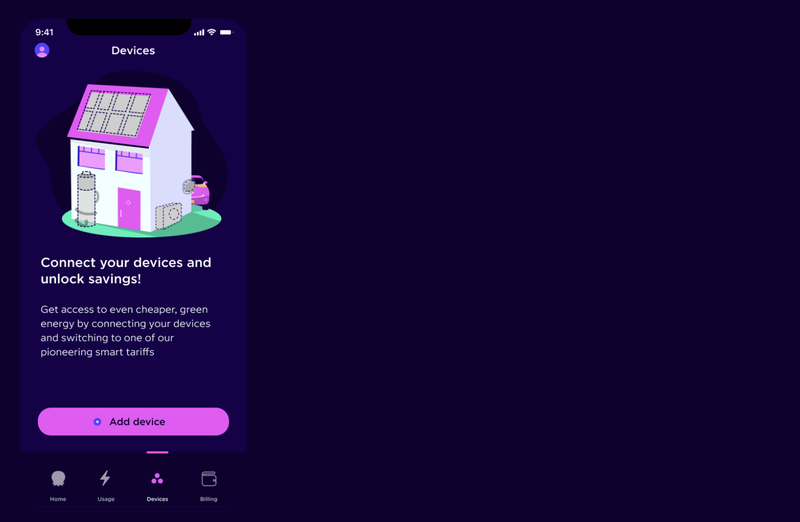
Step 1: Open the Octopus Energy app.
Go to the 'Devices' tab and press 'Add device'.
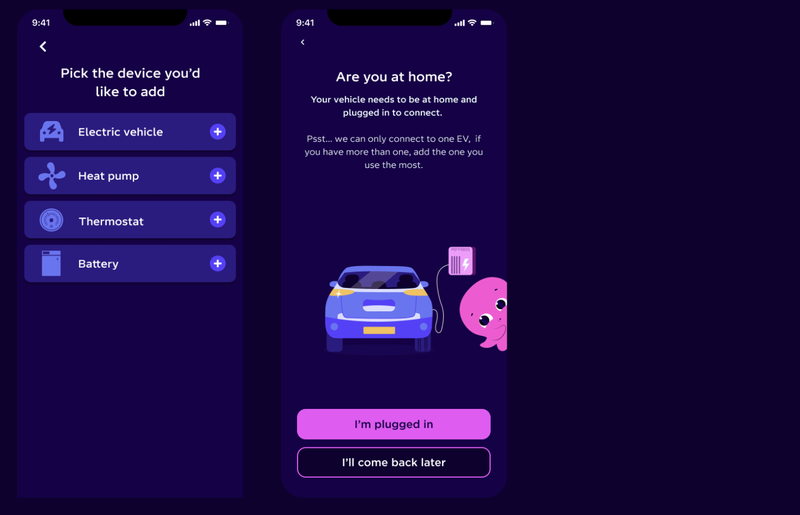
Step 2: Select the device you’d like to integrate with.
For your EV, select 'Electric vehicle'.
You'll be asked if you are at home with your EV plugged in, make sure this is the case before continuing. Your car needs to be plugged in, but not charging.
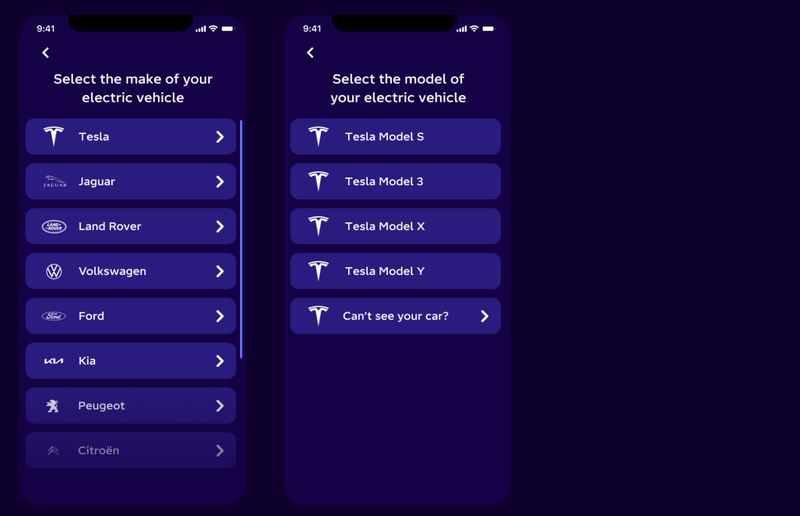
Step 3: Select your EV make and model.
Select your EV make & model from the dropdown.
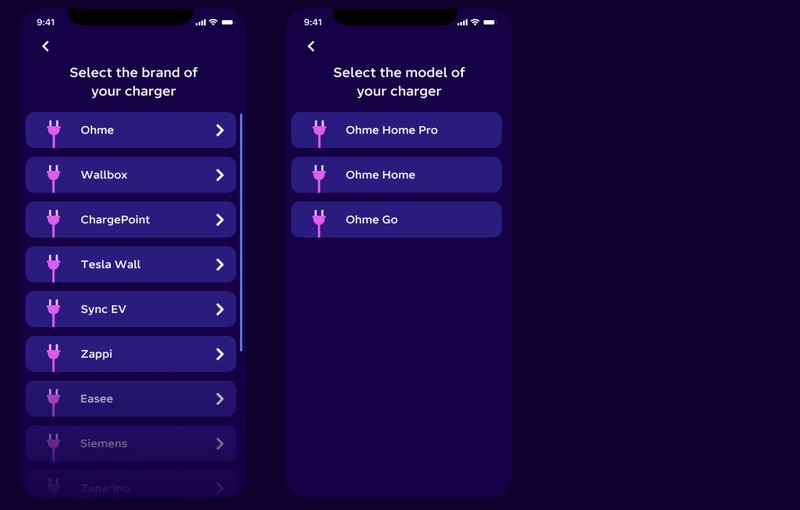
Step 4: Select your charger make and model.
Select your charger make & model from the dropdown.
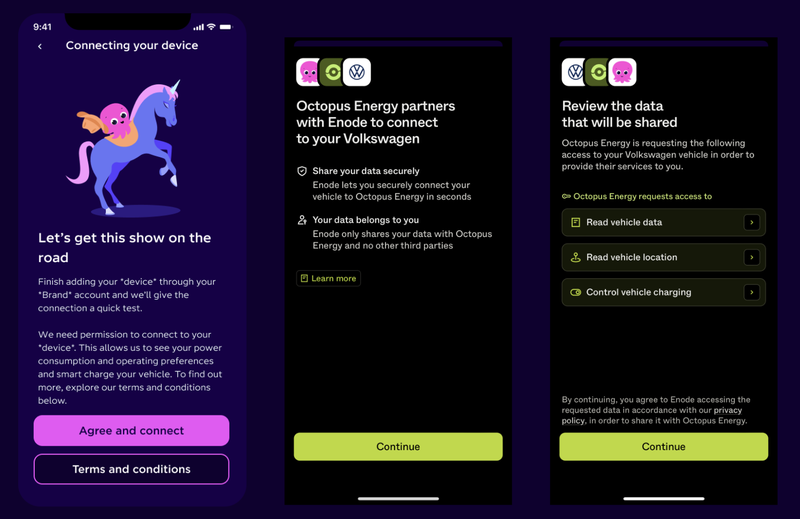
Step 5: Connect your EV
Important: this redirect screen will look slightly different for you, depending on your car brand. This is an example of VW.
We now need to connect to your EV to make sure we can control it and schedule your charging. Click on 'Connect device', you'll then be prompted to sign into your EV account.
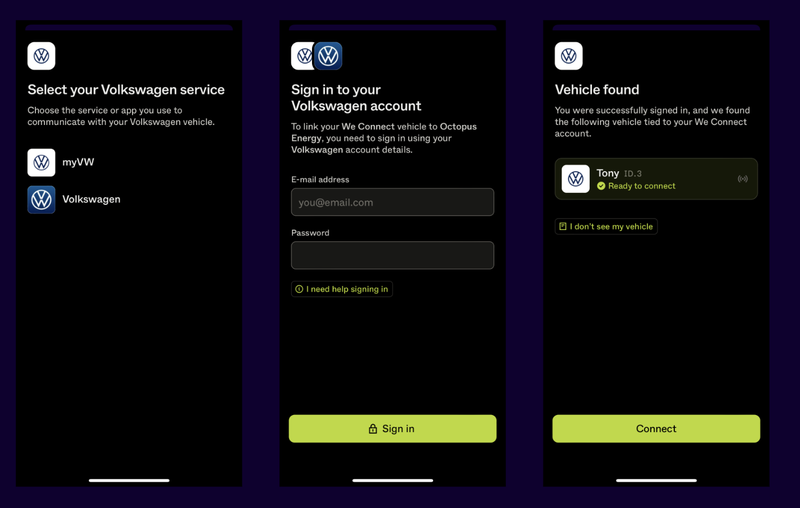
Step 5 continued: Connect your EV
Continue to follow the prompts. Once signed in and a vehicle has been found, click 'Connect'.
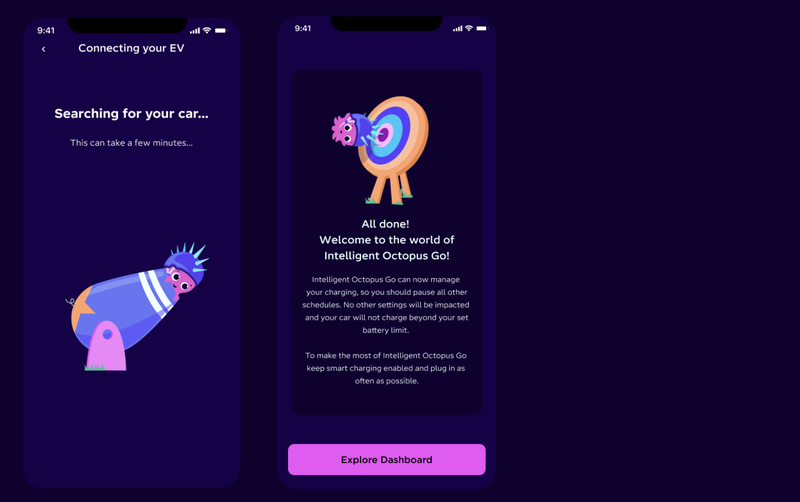
Step 6: Your EV is connected!
Your EV is now connected - press 'Explore Dashboard' to get charging.
Hey I'm Constantine, welcome to Octopus Energy!
×Close window
