The ultimate guide to reading your meter, whatever kind you have

What kind of meter do you have?
Smart meter
You have a digital meter that sends us automatic updates.
SMETS1 Secure™ - older model installed before March 2018 with Secure™ logo
SMETS1 - older model installed before March 2018, no Secure™ logo
SMETS2- latest model installed sometime after March 2018.
Check you're not reading your Generation meter.
Traditional meter
How to check
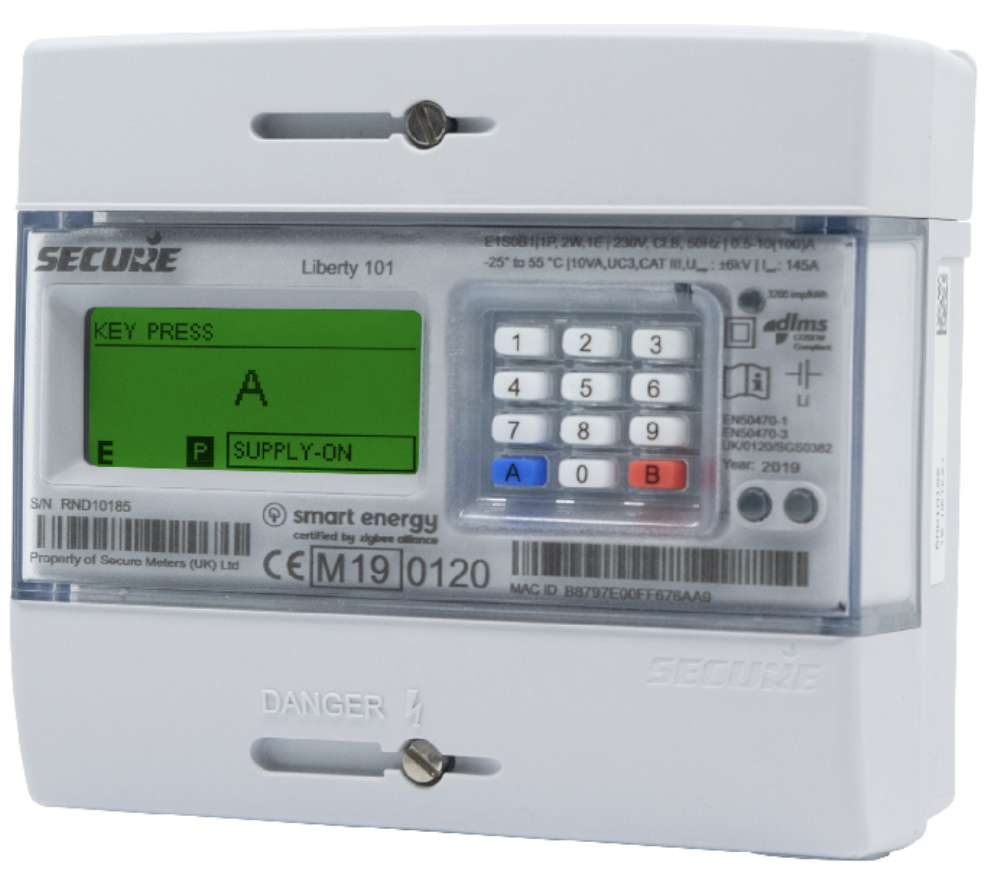
SMETS1 Secure™ first-generation smart meter
Does your smart meter have a Secure™ logo on the front? These were some of the first smart meters we installed before March 2018. We can take automatic readings from all Secure™ SMETS1 meter readers - even if they were installed by a different supplier. But if you need to take a manual reading, here's how:
Make sure not to mix your import and export readings up when submitting them into your account.
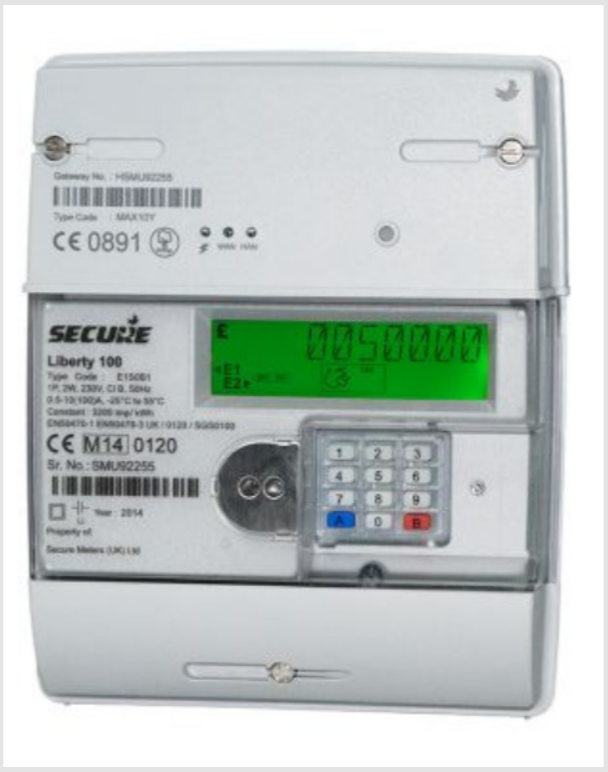
To take a meter reading on a standard electricity tariff (Liberty 100 meter model):
Press 6 on the keypad.
You'll see the letters “IMP R01” appear on the screen.
Wait a moment – then eight digits will appear, followed by “kWh” towards the bottom right of the screen.
Take the first 7 digits – this is your reading (i.e. nothing after the decimal point).
To take meter readings on an Economy 7 electricity tariff (peak and off-peak readings):
Note down your peak rate as above "IMP R01", and then continue to press 6 until you see “IMP R02” appear - this is your off-peak screen.
A second later, you'll see eight digits appear, with “kWh” towards the bottom right of the screen. You'll only need to take the first 7 digits when taking each of these readings (i.e. nothing after the decimal place).
These are your peak and off peak readings.
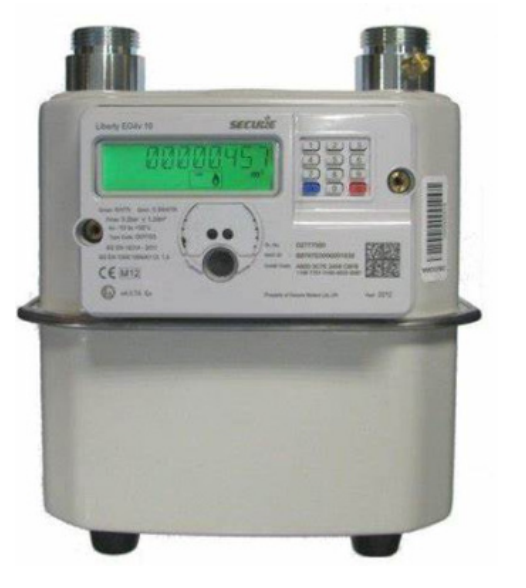
For a smart gas meter, do the following:
Press 9 on the keypad.
The word “VOLUME” will show on the screen.
Your gas reading, in cubic metres (m3) will appear.
Take the first five digits as your reading.
To take an export reading from a Secure SMETS1 smart meter do the following:
Press 9 on the keypad.
The words "EXP kWh" will appear on the screen.
Your reading will appear in kWh.
Take the first 7 digits – this is your reading.
To take an export reading from a Secure SMETS1 smart meter with 2-rates (including Economy 7):
Press 9 on the keypad until you see 'EXP kWh'
Your reading will appear in kWh.
Take the first 7 digits – this is your reading.
SMETS1 first-generation smart meter
If you have a SMETS1 meter that was installed before 2018 but doesn't have a Secure™ logo on the front, we can't take automatic readings at the moment. We're working to change this, but in the meantime, here's how to take a manual reading:
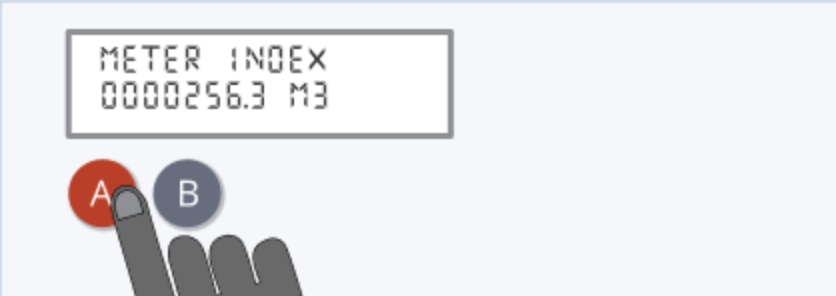
If your meter has A and B buttons:
Press the A button.
Keep on pressing this until you get to “TOTAL ACT IMPORT”.
The number shown below this is your meter reading.
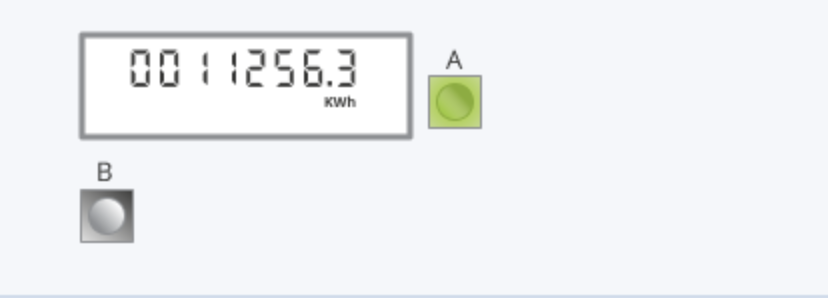
If your meter has a green A and a white B button:
Press and hold the green A button for at least 2 seconds.
Press A again and again to cycle through the displays.
The first row of numbers you'll see is your meter reading.
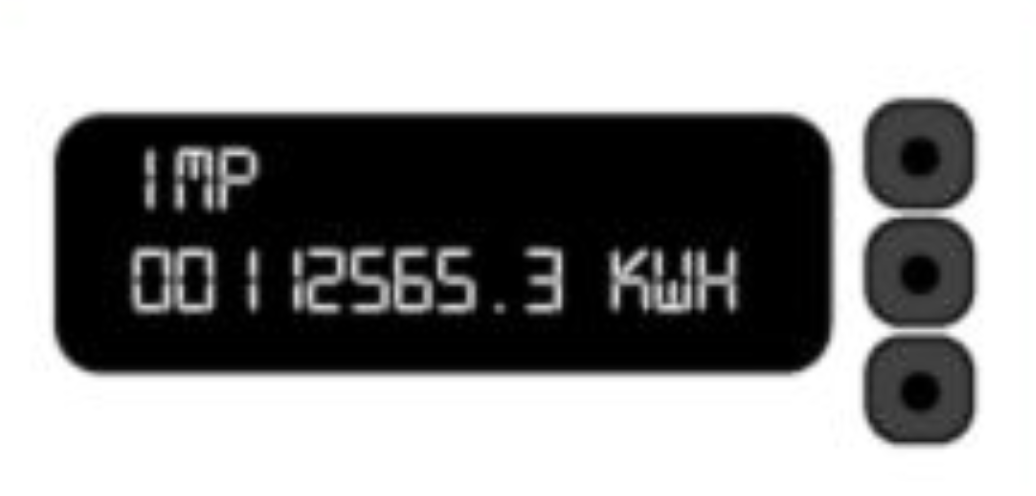
If your meter has three unmarked buttons:
Press the middle button.
The number shown below “IMP” is your meter reading.

If your meter has an orange button and a blue button:
Press the orange button.
You'll see a row of numbers followed by “KWH”, this is your reading.
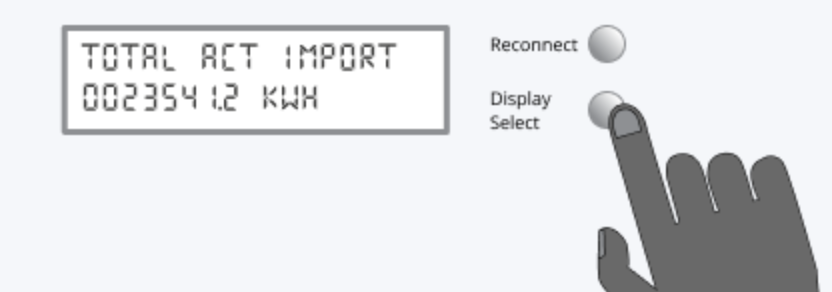
If your meter has two buttons marked Reconnect and Display Select:
Press the “Display” or “Display Select” button.
Keep pressing until it scrolls through a number followed by kWh, this is your reading.
SMETS2 smart meters - latest models
If you're switching to Octopus and already have a second generation (SMETS2) smart meter, we'll soon be able to connect to your meter and take readings automatically, but your very first reading needs to be sent manually.
There are a few different brands of SMETS2 meter – you'll be able to tell which one yours is based on the logo.
Below, we explain how to take a manual meter reading from the most common types of SMETS2 meters. If you aren't sure whether you have a SMETS2 meter, or think you have a SMETS2 meter but can't find it on this list, get in touch.
Make sure not to mix your import and export readings up when submitting them into your account.
Secure SMETS2 electricity meter (Liberty 101):
Press 6 on the keypad.
You'll see your Active Import screen “IMP R01” appear on the screen.
Wait a moment – then eight digits will appear, followed by “kWh” towards the bottom right of the screen.
You'll only need to look at the first 7 digits when taking each of these readings (nothing after the decimal place, for example, 0014821.6 would be 14821).
To take a two-rate reading from your Secure SMETS2 meter:
Take your peak rate as above (IMP R01), and then continue to press 6 until you see “IMP R02” appear - this is your off-peak screen.
A second later, you'll see eight digits appear, with “kWh” towards the bottom right of the screen. You'll only need to take the first 7 digits when taking each of these readings (i.e. nothing after the decimal place).
To take your export reading from your Secure SMETS2:
Press 9 on the keypad until you see 'EXP kWh'
Your reading will appear in kWh.
Take the first 7 digits – this is your reading.
Secure SMETS2 electricity Meter (7-terminal Liberty 116):
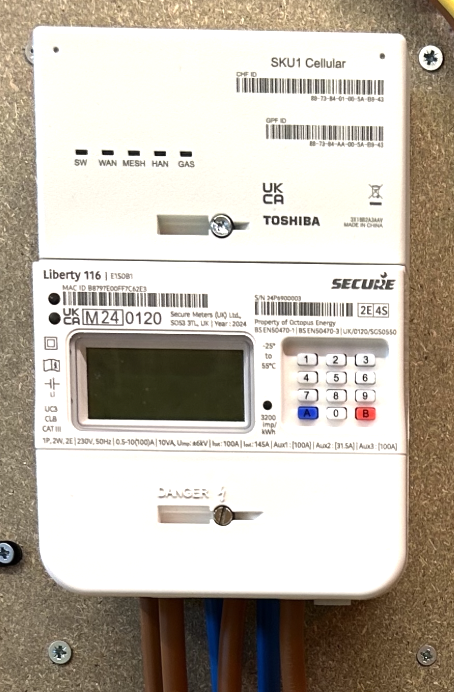
A 7-terminal meter supplies two separate circuits (MPANs) in your home: a primary one (for your main electricity) and a secondary one (usually dedicated to off-peak heating).
To take a reading:
Press 6 on the keypad.
The screen will automatically cycle through your readings. Each reading will end with "kWh".
Write down both of these:
IMPORT REGISTER-E1-01 (Your main house usage)
IMPORT REGISTER-E2-02 (Your dedicated off-peak heating usage)
If your main house is also on a day/night tariff, you will need to write this down too:
IMPORT REGISTER-E1-02 (Your main house off-peak usage)
NB: please ignore IMPORT REGISTER-E2-01.
Aclara SMETS2 electricity Meter:
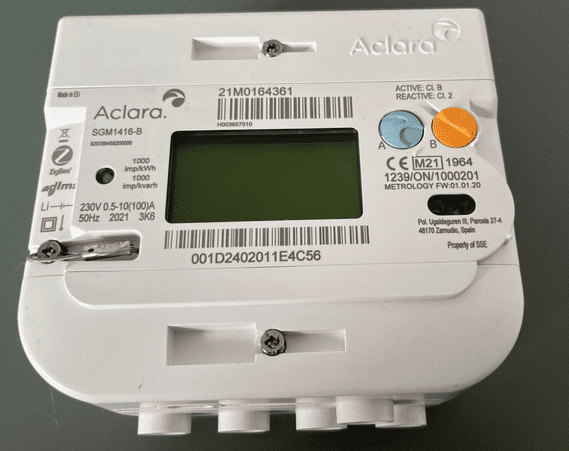
Press A to wake up the screen.
Continue to press 'A' to cycle through the different options until you see 'Total Active Import'.
Once you get to this option, you should be able to see your electricity reading.
To take an export reading from your Aclara SMETS2 electricity meter:
Press the B button to wake the screen up.
After the screen lights up, press the B button several times until you see a message that starts with either ‘Total’ or ‘TOU’.
Press the A button several times until you see ‘Total Active Export’ - this screen will show your export reading in kWh.
Aclara SMETS2 gas meter
Press the middle button once to wake up the screen. This should automatically reveal your gas reading.
Landis and Gyr SMETS2 meters:

Landis and Gyr SMETS2 meters:
Press 'B' to light the screen up. You should be given the option for a meter boost.
Press 'A' to select 'No', and then you should be able to see your electricity reading.
To take two rate meter readings from your Landis and Gyr SMETS2 electricity meter:
The screen will start showing your first (R01) reading
Press B to light up the screen
Hold B for 5-10 seconds.
Press A to move to your second (R02) reading
Press A again to move back to R01
To see R02 again, hold B, then press A to swap between the reads again
To take an export reading from your Landis and Gyr SMETS2 electricity meter:
Your Landis + Gyr smart meter will have either:
Two equal sized green A and grey B buttons, to the right of the screen
A bigger green A button to the right of the screen, and a smaller black B button underneath the screen
If your meter has equal sized A and B buttons:
Press the A button to get to the screen that says ‘Credit mode bal’.
Press and hold the A button for around 2 seconds, until the screen shows the time.
Press the A button several more times to cycle through the meter's screens until you see your ‘Total Act Export’ reading in kWh.
If your meter has a larger green A button and a smaller black B button:Press and hold the A button until the time appears.
Press the A button several more times to cycle through the meter's screens until you see your ‘Total Act Export’ reading in kWh.
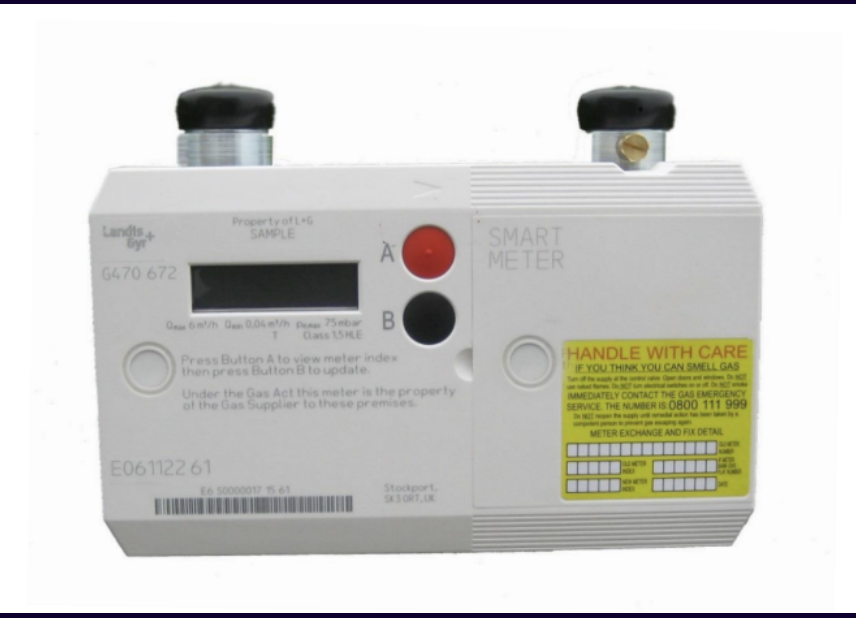
Landis and Gyr Smets2 gas meter:
Press either 'A' or 'B' to wake up the screen.
This should automatically come up with your gas reading.
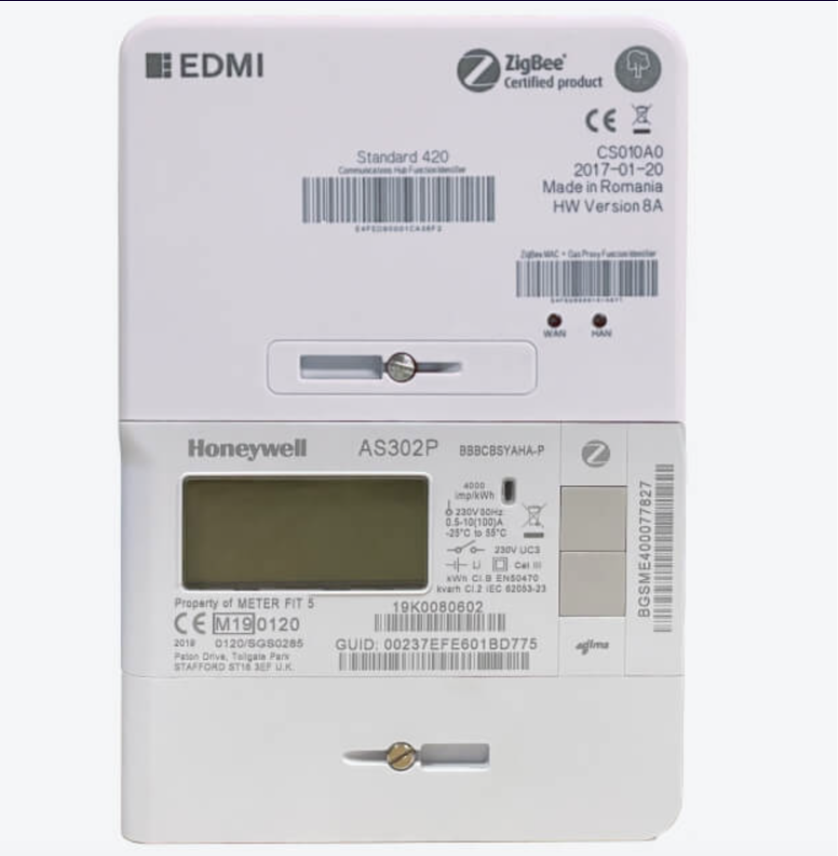
ELSTER/Honeywell AS302P SMETS2 meter:
First locate the two grey buttons on the right side of the display.
Press the top button “A” to wake up the display backlight and display the ‘General’ menu
Push the bottom button “B” to scroll through menu options: ‘General’, then ‘Boost’, and then ‘Registers’ menus will be displayed
Select the ‘Registers’ menu by pressing button A
Push button B to scroll through menu options: ‘Cumulative’, then ‘Rates in Use’, and then ‘Rates 1-48’ menus will be displayed
Select the ‘Rates 1-48’ menu by pressing button A
Use the push button B to scroll through menu options: ‘Imp. R1’ and select by pressing button A. This is your single rate meter reading
To take two rate meter readings from your ELSTER/Honeywell AS302P SMETS2 electricity meter:
Press the top button “A” to wake up the display backlight and display the ‘General’ menu
Push the bottom button “B” to scroll through menu options: ‘General’, then ‘Boost’, and then ‘Registers’ menus will be displayed
Select the ‘Registers’ menu by pressing button A
Push button B to scroll through menu options: ‘Cumulative’, then ‘Rates in Use’, and then ‘Rates 1-48’ menus will be displayed
Select the ‘Rates 1-48’ menu by pressing button A
Use the push button B to scroll through menu options: ‘Imp. R1’ then ‘Imp. R2’ and select by pressing button A. This is your two rate meter reading
To take an export reading from your ELSTER/Honeywell AS302P SMETS electricity meter:
Press the top button “A” to wake up the display backlight and display the ‘General’ menu
Push the bottom button “B” to scroll through menu options: ‘General’, then ‘Boost’, and then ‘Registers’ menus will be displayed
Select the ‘Registers’ menu by pressing button A
Push button B to scroll through menu options: ‘Cumulative’
Select the ‘Cumulative’’ menu by pressing button A. It should show your ‘Import’
Push button B to scroll through menu options until you see ‘Export’ in kWh. This ‘Cum. Exp.’ figure is your solar export reading
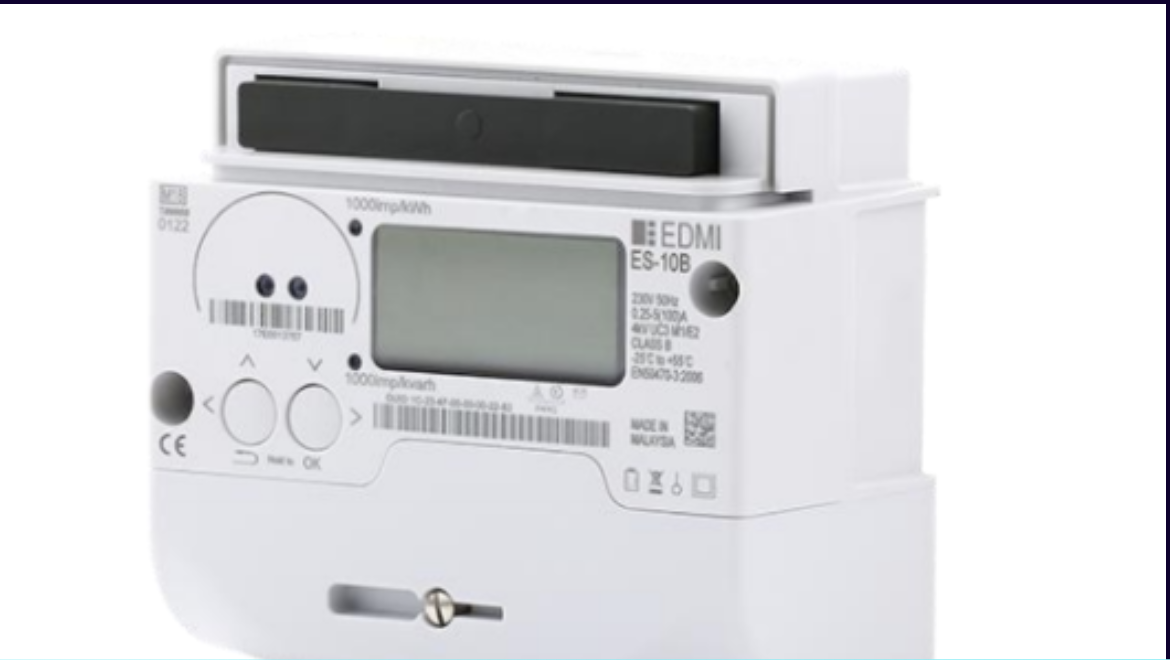
EDMI SMETS2 electric meter:
Your EDMI SMETS2 electricity meter should auto-display your meter reading on the main screen (It will revert back to this screen if you do not press any buttons 1 minute).
To take two rate meter readings from your EDMI SMETS2 electricity meter:
Hold OK until it enters the ‘Main Menu’, you will see ‘Billing’ appear
Hold OK to enter the ‘Billing’ sub-menu
Using the arrows, scroll to ‘Advancd’ (2 pushes of the > button)
Hold OK to enter the ‘Advanced’ sub-menu, you will see ‘TOUmtrx’ appear
Hold OK to enter the ‘TOUmatrx’ sub-menu, you will see ‘RATE1’ appear
Use the arrows to cycle the rates you need to submit (Rate 1, Rate 2, …)
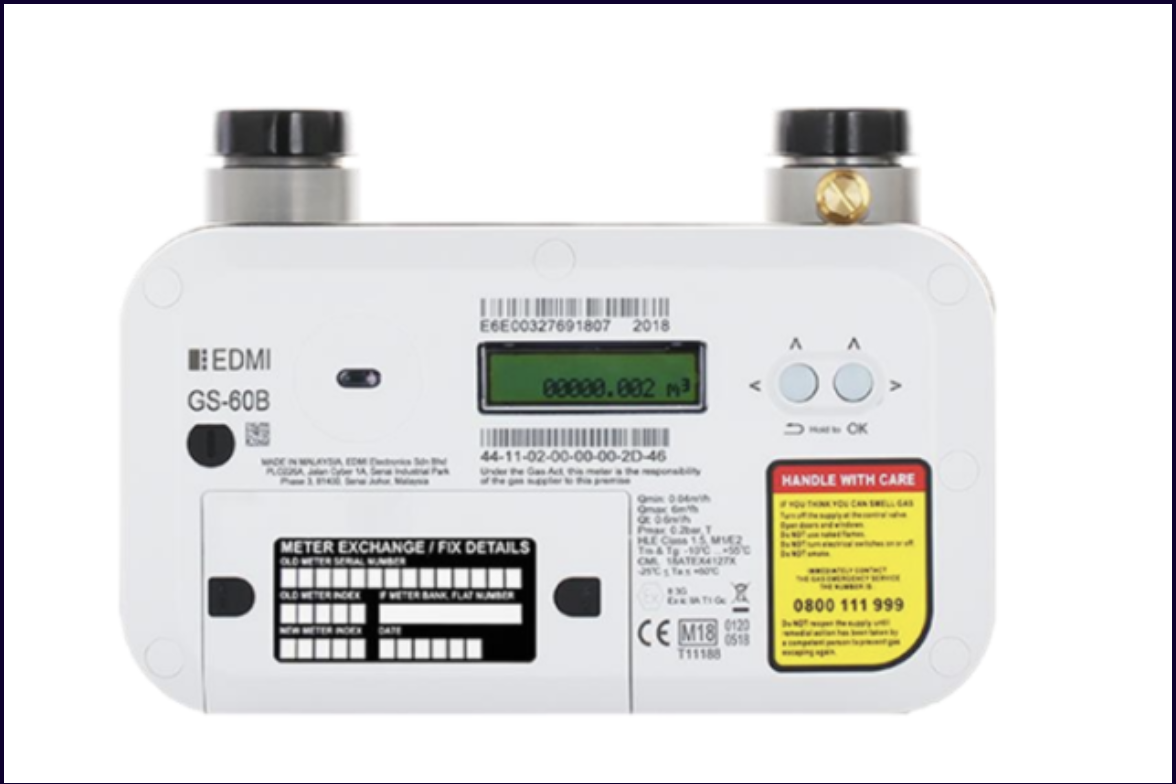
EDMI SMETS2 gas meter:
Your EDMI gas meter should auto-display your meter readings. If the screen has gone to sleep:
Press the button on the right to wake up the meter screen.
You should see the words 'Consumption in M³, and a number which is your meter reading.
The display will automatically cycle through other screens, but this first one is your reading.
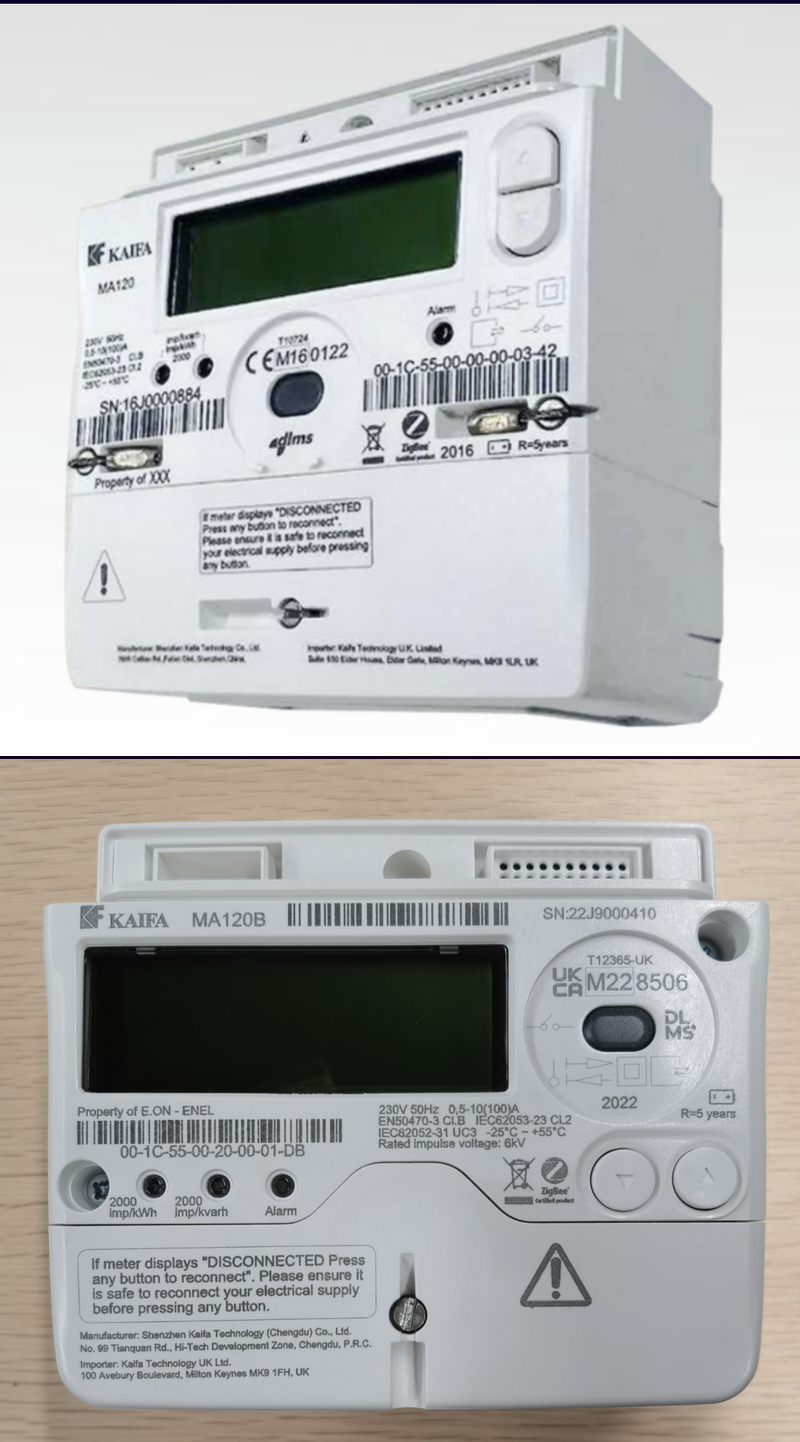
Kaifa MA120 SMETS2 Electric Meter:
This meter does not require 'waking up' and uses a default auto scroll mode, cycling through its four screens. It will cycle through to the screen with your meter reading on automatically.
Some of these meters have Up and Down buttons in a vertical configuration (the first image), others have Up and Down buttons in a horizontal configuration (the second image).
To take two rate meter readings from your Kaifa SMETS2 electricity meter:
Press the Up button (K1) to enter the menu system.
When the arrow on the menu system screen is next to General Display, press and hold the Up button (K1).
Then press the Down button (K2) to scroll down to Tariff Matrix. With the arrow next to Tariff Matrix, press and hold the Up button (K1).
When the arrow on the screen is next to TOU Register, press and hold the Up button (K1). T01 shows the total for R1, T02 shows the total for R2. T03 and 4 shows the unused Rate band.
To take an export reading from your Kaifa SMETS2 electricity meter:
Your meter will automatically switch between 4 different screens - you don’t need to push any buttons.
Your export reading is on the screen that shows ‘-A value’ in kWh.
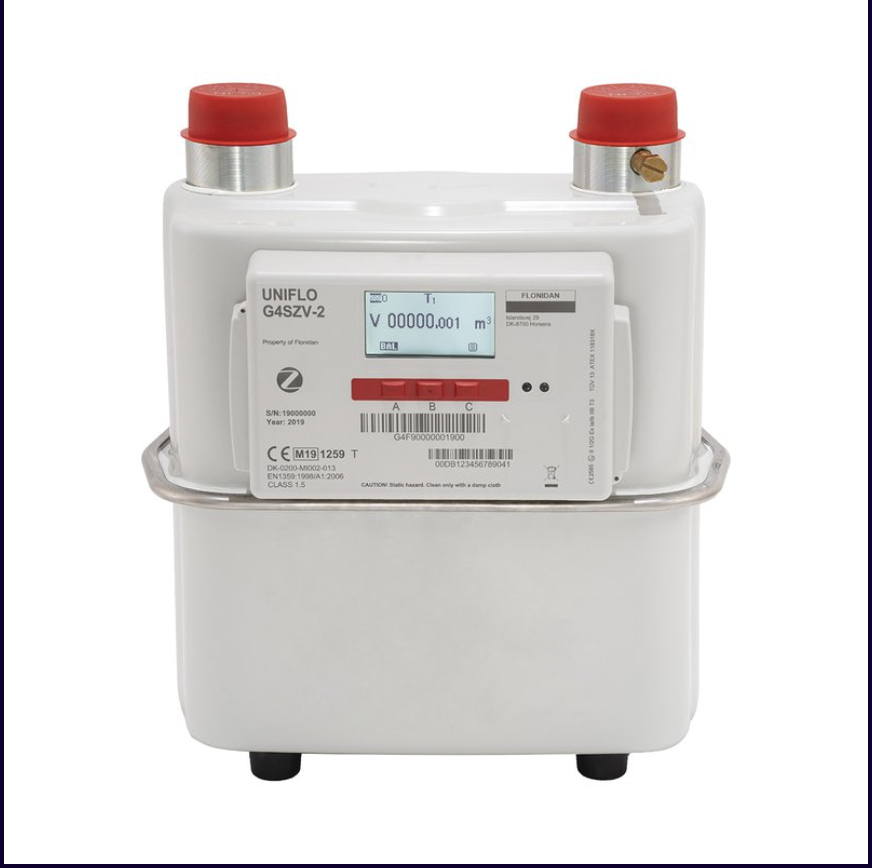
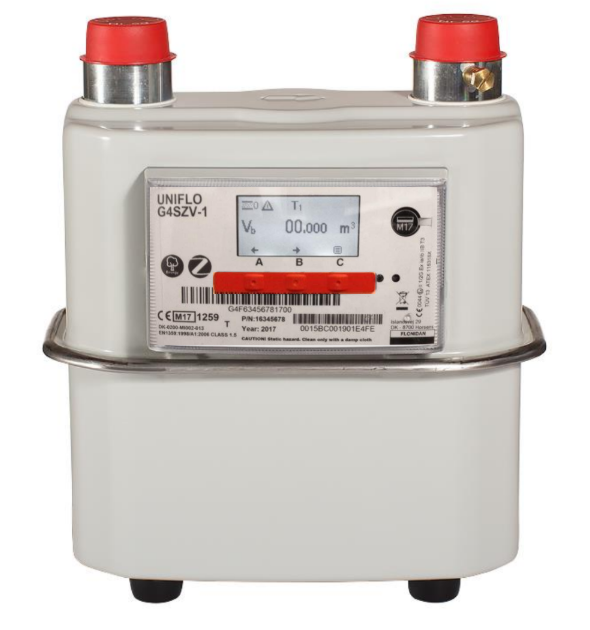
Flonidan G4SZV SMETS2 gas meter:
When reading your Flonidan smart gas meter, your meter reading should be displayed automatically on the default screen.
It should be a number preceded by a large 'V' and followed by 'm3' If you have cycled off that screen.
You can use the 'left' and 'centre' push buttons beneath the screen to cycle back to it.
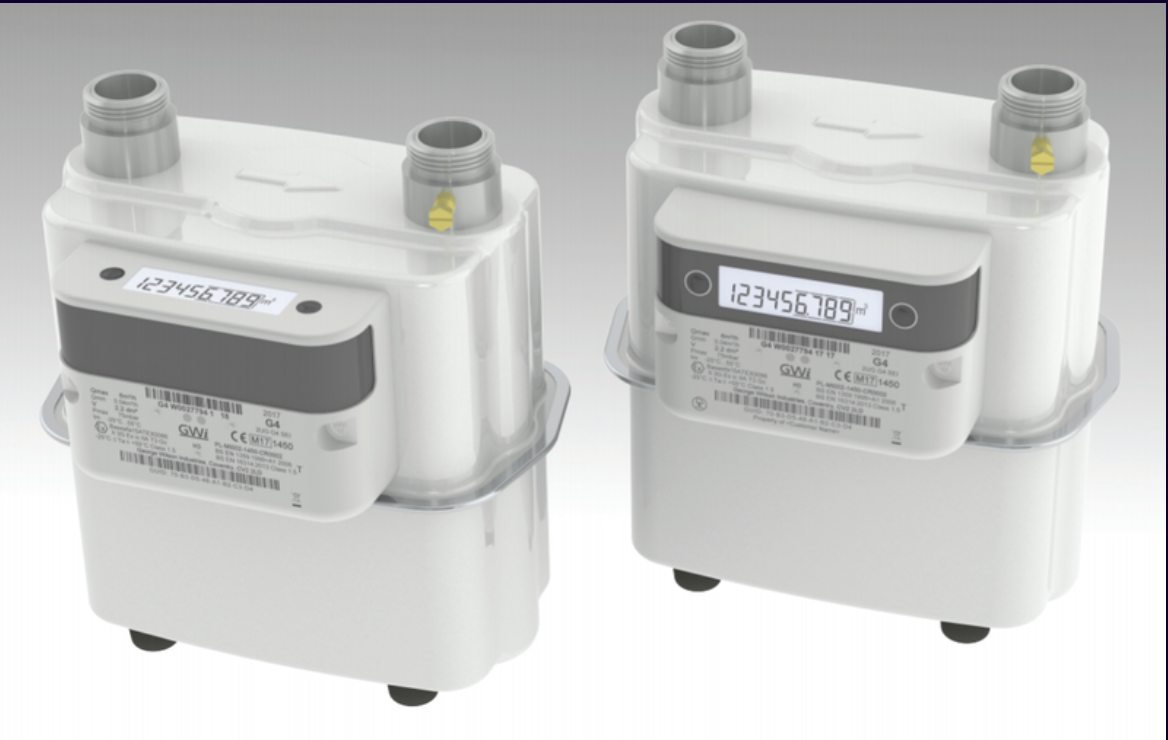
G4 Metrix GWi smart electronic gas meter:
Press the right-hand side button twice in quick succession to access the manual scroll sequence.
Windows '02' displays the meter reading
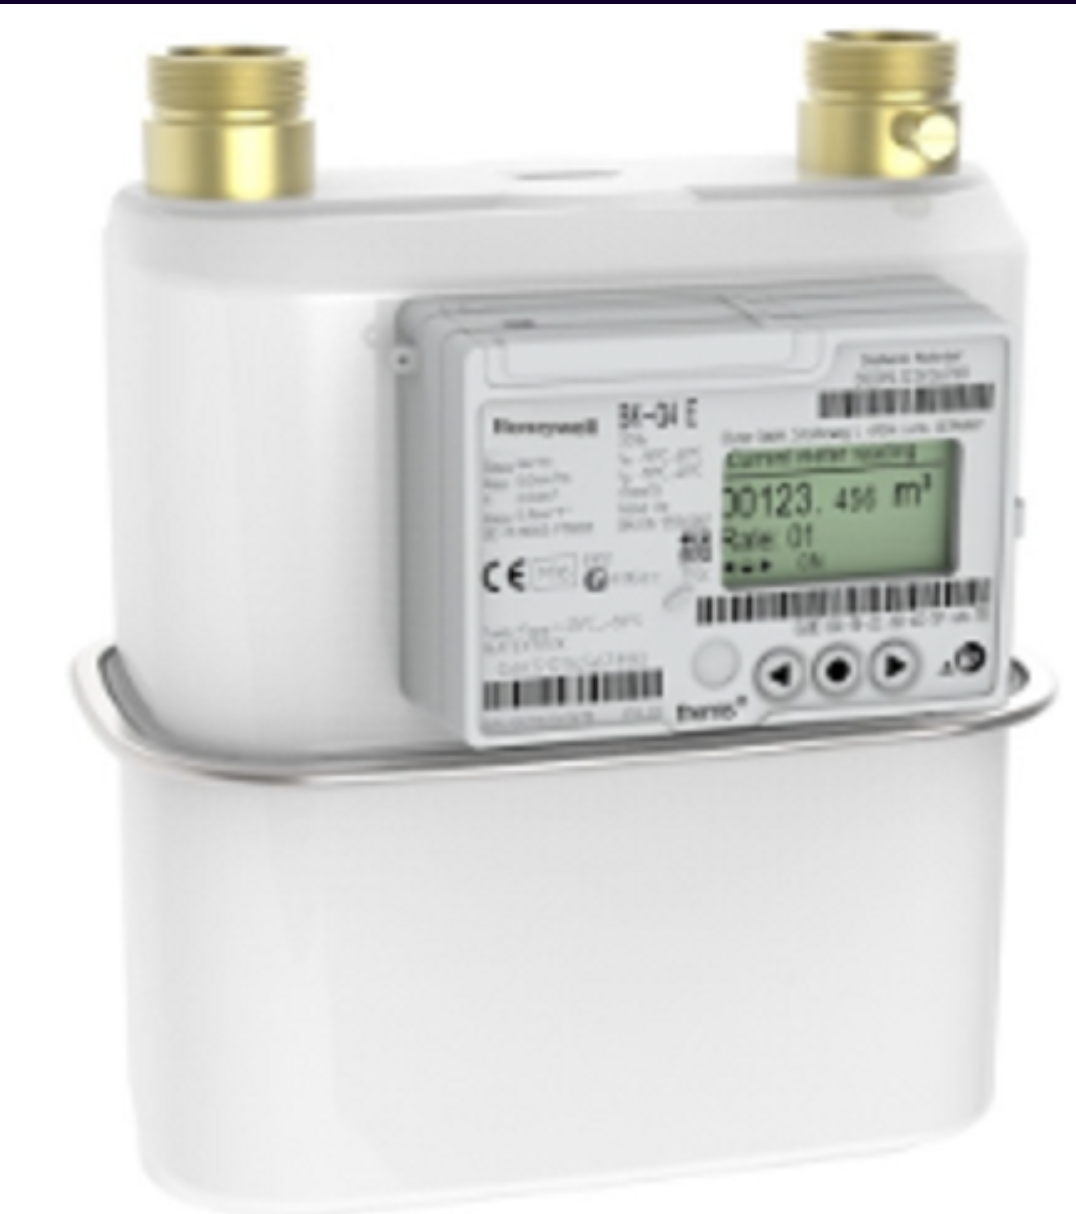
Honeywell/Elster SMETS2 Gas Meter:
The reading will be on the screen, if the display has gone to sleep mode, press any button to get the reading which will be shown on the display.
If you have a generation meter:
Be careful not to mistake your generation meter for your standard smart meter. We don't want these types of readings submitted accidentally in place of your actual billable smart meter readings.
Not everyone will have a generation meter - these more most usual when you have a Feed-in-Tariff and they record the energy you generate.
If you don't have one of these, you don't need to worry.
Traditional meters
How to read a traditional analogue meter
Electricity Meters
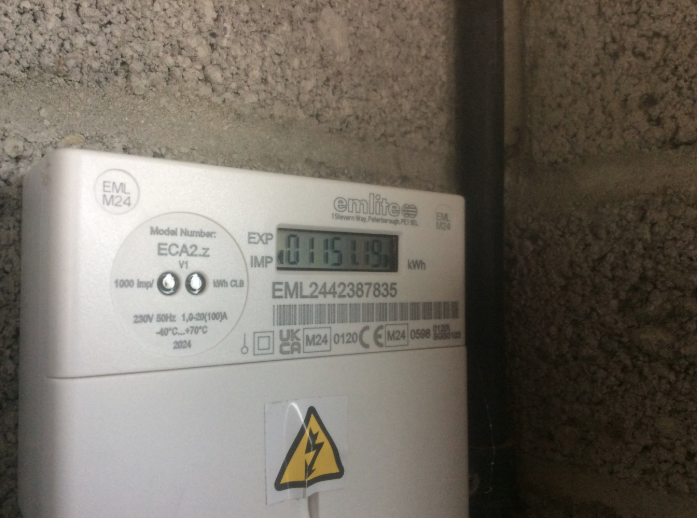
Digital single meter
Looks like this:

How to read:
Write down the five numbers as they appear. Ignore the red one.
Digital dual meter
Looks like this:
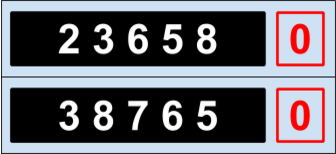
This is for those of you on two energy rates for different times of the day. The cheaper one is on top.
How to read:
Write down the five numbers as they appear, ignoring the red ones.
Digital dual meter (single display)
Looks like this:
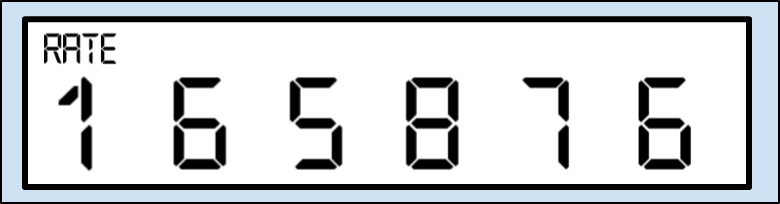
Some dual meters have a single display where you might have to press a button to view each rate.
How to read:
Write down the numbers as they appear.
Press the button to see the next reading, then write that down too.
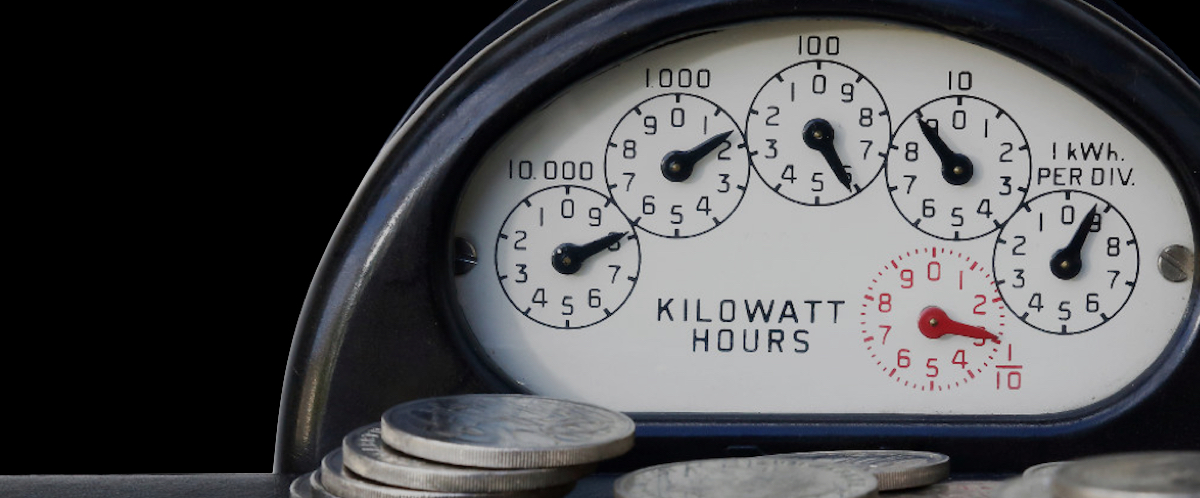
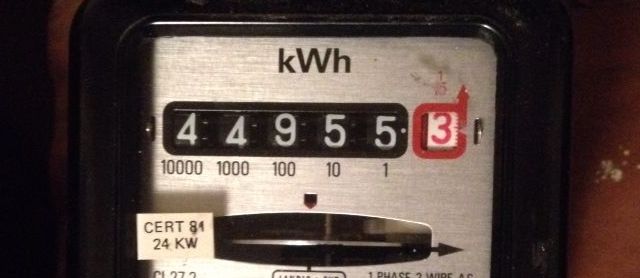
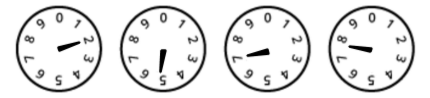
Dial meter
Looks like this:

Here you’ll see five dials, each with numbers 0 to 9. There may be a sixth dial on the right, sometimes in red, or with 1/10 next to it – ignore this.
How to read:
Write down the numbers the pointer has just passed, from left to right.
If the pointer lies exactly on any number, underline it (in the above example, you would underline the 4).
Now, look at your five numbers. For any that are underlined, look at the number following it – if it’s between 9 and 0, reduce your underlined number by one. The above example would therefore be 1 3 9 7 0.
Gas
Like electricity, there are a few different types of gas meter, but they’re all fairly simple to read.
Digital imperial meter
Looks like this:

How to read:
Write down the first four numbers as they appear. Ignore the red ones.
Digital metric meter
Looks like this:

How to read:
Write down the first five numbers as they appear – ignore the numbers after the decimal point (sometimes in red).
Dial meter
Looks like this:
If you’ve got a traditional analogue energy meter (not a smart one), you’ll need to send in regular meter readings so we can work out how much energy you’re using. Smart meters remove the need for meter readings (they send readings to us automatically - register your interest in a smart meter and we'll be in touch when engineers are available in your area) but there are a handful of situations where you might still need to take a manual meter reading from your smart meter.
If you're on one of our export tariffs, you'll have to provide 'export readings' from your SMETS1 or SMETS2 meter (not your generation meter, or your In-Home Display) so we can calculate your export payments. Below, in our guides to taking readings from SMETS1 and SMETS2 meters, we'll also explain how to take export readings from a range of different meters. If you're meter isn't included on the list, don’t hesitate to get in touch.
Electricity and gas meters come in several different shapes and sizes, so before we can tell you how to read your meter, it’s important to work out which type of meter you have.
We understand that meter readings can sometimes be a little fiddly, so if you need a hand, don’t hesitate to get in touch!
Published on

Jackson Howarth
Senior Writer