How to connect your Zappi to the Octopus Energy app

First, you need to be an Octopus Energy customer. If you’re not one yet, you can sign up here.
You also need to be on either the Intelligent Octopus Go tariff- you can switch tariff in two clicks here
Or our Intelligent Drive Pack tariff- which you can subscribe to here.
Once you switch tariff, you'll have 7 days to connect your Zappi to the Octopus Energy app.
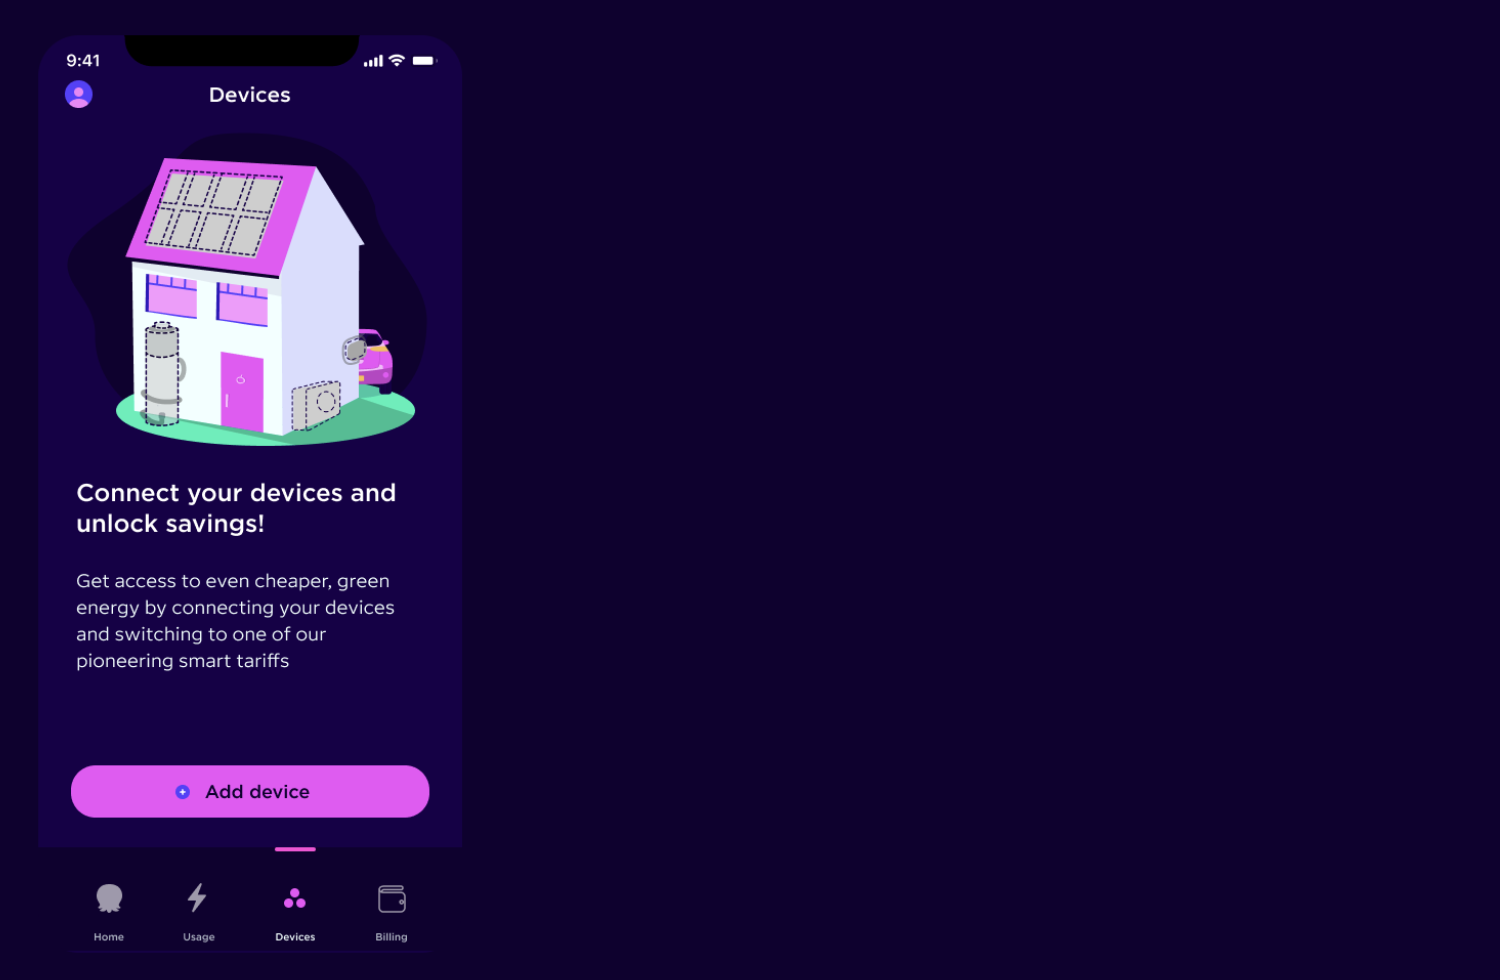
Step 1: Open the Octopus Energy app.
Go to the 'Devices' tab and press 'Add device'.

Step 2: Select the device you’d like to integrate with.
For your Zappi, select 'Electric vehicle'.
You'll be asked if you are at home with your EV plugged in, make sure this is the case before continuing. Your car needs to be plugged in, but not charging.
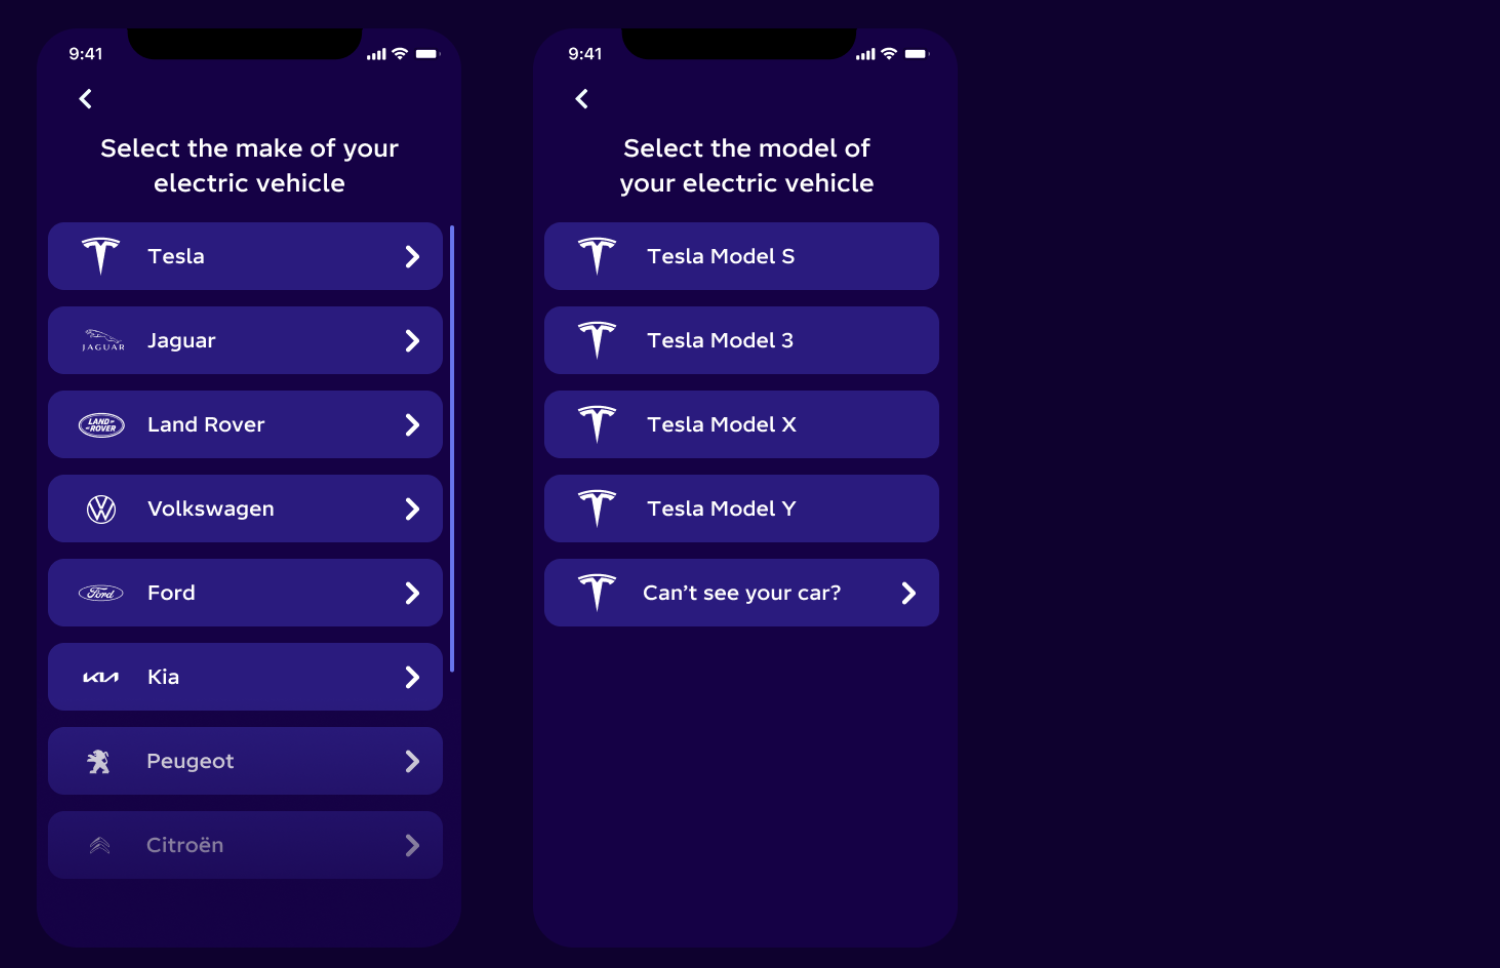
Step 3: Select your EV make and model.
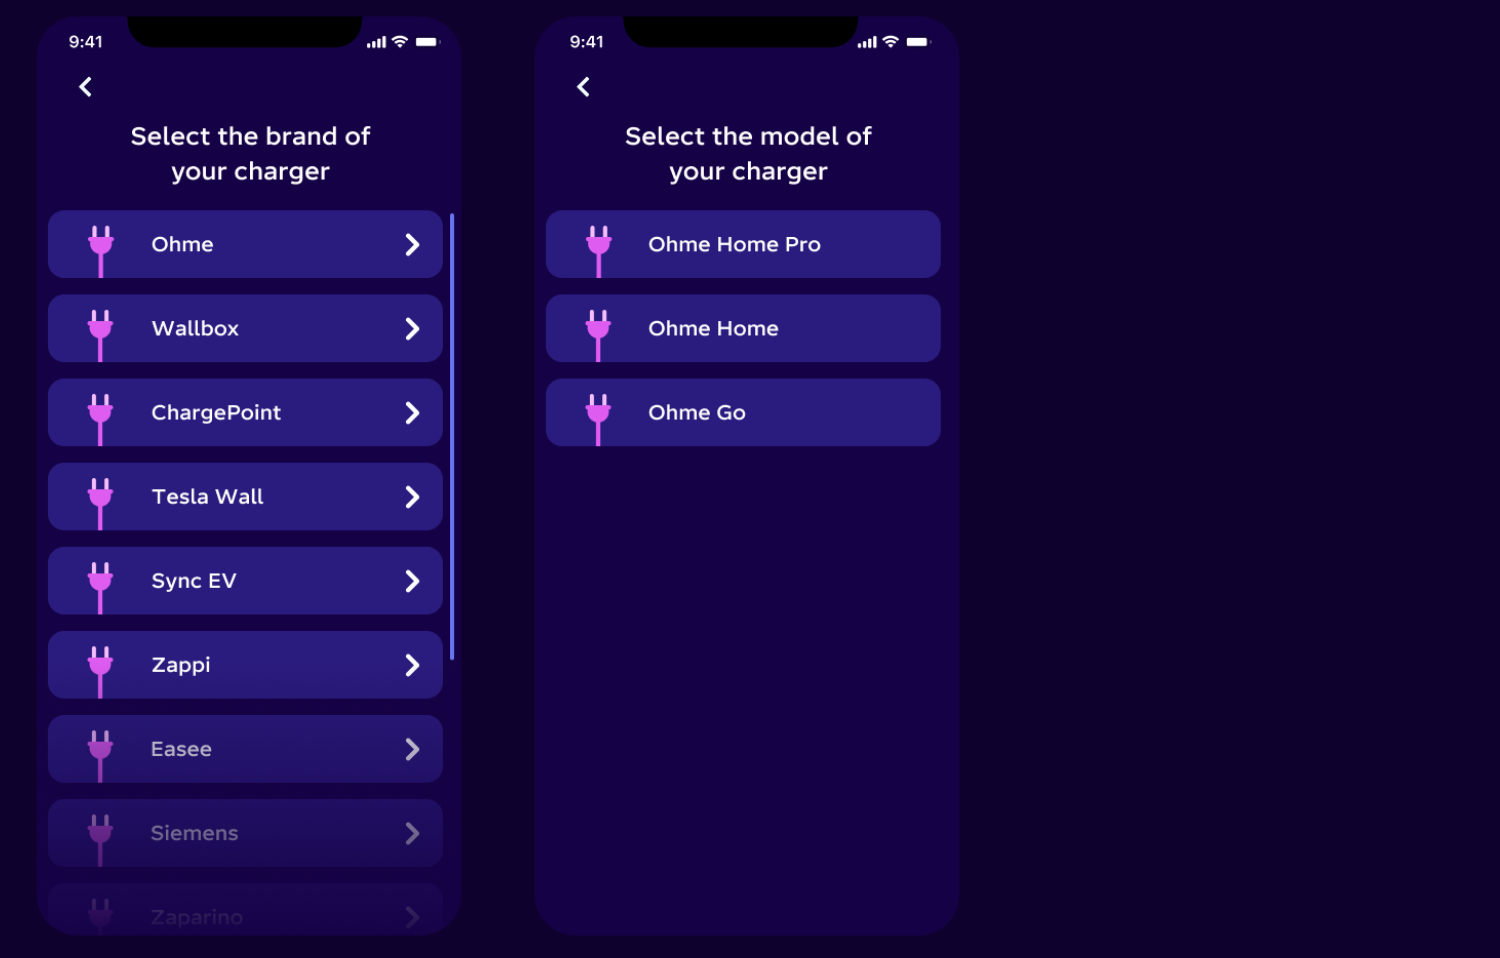
Step 4: Select your Zappi model
Select 'Myenergi' from the dropdown and select your model.
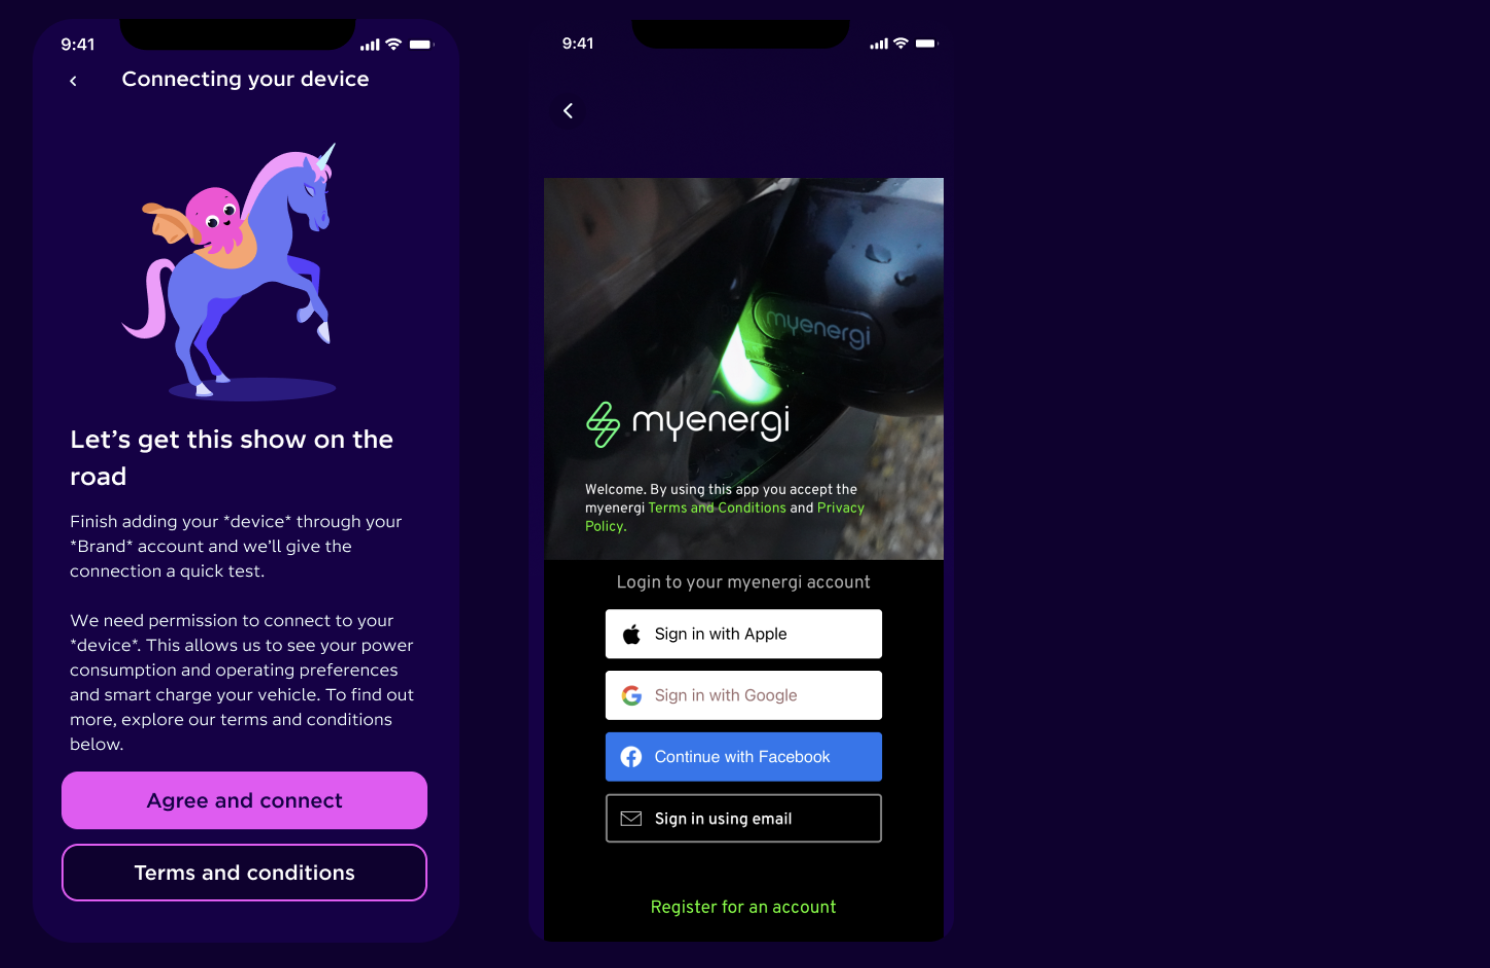
Step 5: Connect your Zappi
We now need to connect to your Zappi to make sure we can control it and schedule your charging.
If you are happy with the T&Cs, tap 'Agree and connect' and then sign in to your Myenergi account.
Once logged in, you will be asked to select the charger that you'd like to link and then tap 'Continue'.

Step 6: Your Zappi is connected!
Your Zappi is now connected - press 'Explore Dashboard' to get charging.
FAQs
Make sure that the login method that you use for connecting your device is the same as the one you use to login to the myenergi app. As a test, log out of your myenergi app and login to the myenergi account.
Yes, as long as you don’t have more than one Zappi. If you do happen to have more than one Zappi linked to your myenergi account, one will need to be removed from your myenergi account in order to onboard successfully.
Published on

Phil Steele
Future Technologies Evangelist