
How to connect your Octopus Charge to the Octopus Energy app

Lets dive in, if you’ve not done so already download or update to the latest version of the Octopus Energy app and login.
Heads-up: You’ll need to be close to your charger when you go through the next steps.
Already set up Octopus Charge and want to find out how to use it? tap here
Step 1: Open the Octopus Energy app.
Go to the 'Devices' tab and press 'Octopus Charge'.
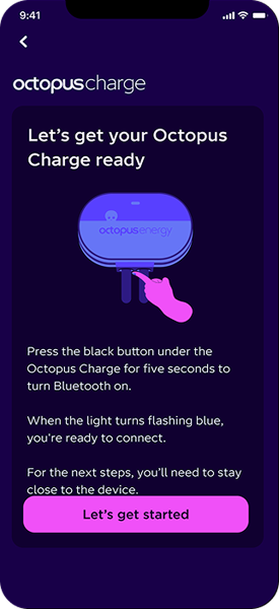
Step 2: Press and hold the button under the charger for 5 seconds until the LED light starts flashing blue. Then tap let’s get started.
You'll be asked to enter the six digit bluetooth pin that is on the front of the customer guide.
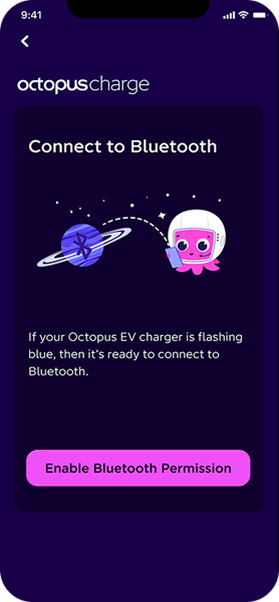
Step 3: Turn on Bluetooth permissions so that the Octopus app can connect to the charger.
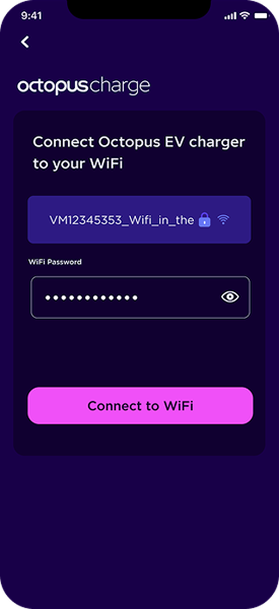
Step 4: Is only displayed if Octopus Charge has not been able to connect to 4G.
Make sure the WiFi network that your mobile devices is connected to is the one that you want Octopus Charge to connect too.
Note: Octopus Charge works with 2.4GHz WiFi networks.
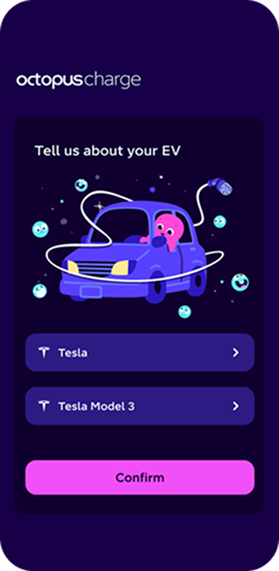
Step 5: Select your EV make and model.
Select the correct make and model so we know your battery size and can provide the right amount of charge.
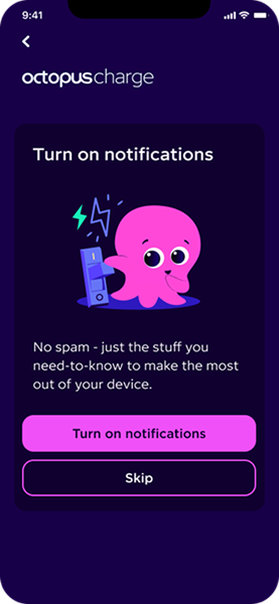
Step 6: Turn on notifications so you can see when a charging schedule is sent.
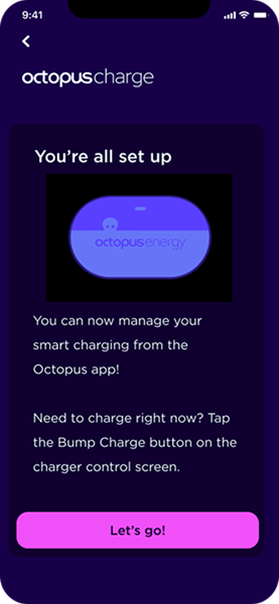
Step 7: Your Octopus Charge is all set up!
Tap 'Let’s go!' to get charging.
If you don’t see this screen, don’t worry!
It just means your charger is already up to date.
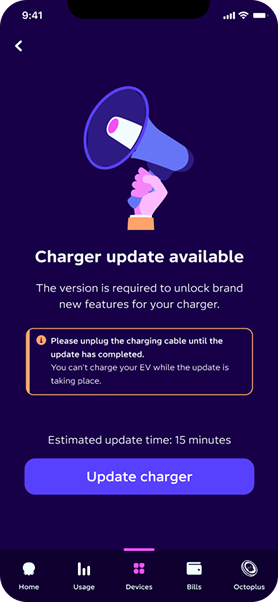
NB: Make sure the charger is not plugged in before starting the update.
Step 8: Update your charger
There’s a software update available to get the latest features. The update takes about 15 minutes.
Tap ‘Update charger’ to start.

The update takes about 15 minutes - perfect time for a quick cup of tea.
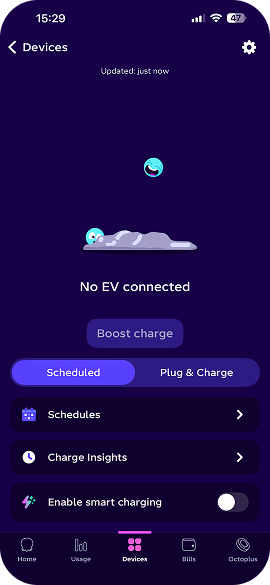
Step 9: Choose your charging mode
On the control screen, you can switch between:
- Scheduled - charges only at the times you set
- Plug & Charge - charges automatically whenever your EV is plugged in
To view the default schedule or set new times, tap ‘Schedules’.
Tap on charge insights to see a list of your charging history
If you’re on an Octopus Energy Intelligent EV tariff, you can enable smart charging by turning the toggle on.
Tap the settings cog in the top right to explore more features.
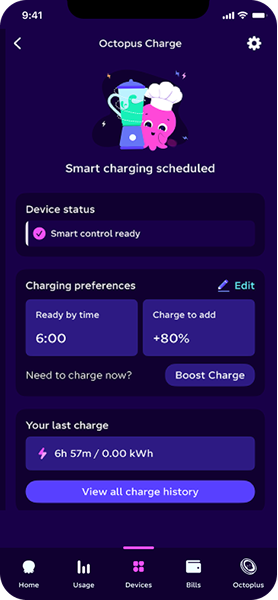
Step 10: Set the time you want your EV to be charged by, and the percentage of charge you’d like to add.
How-to videos
Once your Octopus is all set up, smart charging is ready to go.
If you’re an Octopus Energy customer with smart meters, you can enable Smart Charging in just a few taps. This short video walks you through how to switch it on.
Prefer to stay in control yourself? If you’re currently using Smart Control and want to switch back to Manual Control, this video shows you exactly how to do it.
Got a question? Dive into our FAQs page - it’s packed with quick answers and handy tips to keep things running smoothly.
Published on 13th October 2025 by:

Hey I'm Constantine, welcome to Octopus Energy!
×Close window